Gráficos de Excel VBA
Los gráficos se pueden denominar objetos en VBA, de manera similar a la hoja de trabajo, también podemos insertar gráficos en VBA de la misma manera, primero seleccionamos los datos y el tipo de gráfico que queremos para los datos, ahora hay dos tipos diferentes de gráficos que proporcionamos uno es el gráfico de inserción donde el gráfico está en la misma hoja de datos y otro se conoce como la hoja del gráfico donde el gráfico está en la hoja separada de los datos.
En el análisis de datos, los efectos visuales son los indicadores clave de rendimiento de la persona que ha realizado el análisis. Las imágenes son la mejor manera posible que un analista puede transmitir su mensaje. Dado que todos somos usuarios de Excel, normalmente dedicamos una cantidad considerable de tiempo a analizar los datos y sacar conclusiones con números y gráficos. Crear un gráfico es un arte para dominar, y espero que tenga un buen conocimiento sobre cómo crear gráficos con Excel. En este artículo, le mostraremos cómo crear gráficos utilizando la codificación VBA.

¿Cómo agregar gráficos usando código VBA en Excel?
# 1 - Crear gráfico usando codificación VBA
Para crear cualquier gráfico, deberíamos tener algún tipo de datos numéricos. Para este ejemplo, voy a utilizar los datos de muestra siguientes.

Ok, saltemos al editor de VBA.
Paso 1: Inicie el procedimiento secundario.
Código:
Sub Charts_Example1 () End Sub

Paso 2: Defina la variable como Gráfico.
Código:
Sub Charts_Example1 () Dim MyChart As Chart End Sub

Paso 3: Dado que el gráfico es una variable de objeto, debemos establecerlo .
Código:
Sub Charts_Example1 () Atenuar MyChart como conjunto de gráfico MyChart = Charts.Add End Sub

El código anterior agregará una nueva hoja como una hoja de gráfico, no como una hoja de trabajo.

Paso 4: Ahora, necesitamos diseñar el gráfico. Abrir con declaración.
Código:
Sub Charts_Example1 () Atenuar MyChart como conjunto de gráficos MyChart = Charts.Añadir con MyChart Finalizar con End Sub

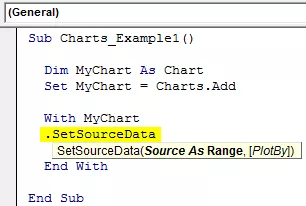
Paso 5: Lo primero que debemos hacer con el gráfico es establecer el rango de origen seleccionando el método "Establecer datos de origen" .
Código:
Sub Charts_Example1 () Dim MyChart As Chart Set MyChart = Charts.Add With MyChart .SetSourceData End With End Sub
Paso 6: Aquí, debemos mencionar el rango de fuente. En este caso, mi rango de origen está en la hoja denominada "Hoja1" y el rango es "A1 a B7".
Código:
Sub Charts_Example1 () Dim MyChart As Chart Set MyChart = Charts.Add With MyChart .SetSourceData Sheets ("Sheet1"). Range ("A1: B7") End With End Sub

Paso 7: A continuación, debemos seleccionar el tipo de gráfico que vamos a crear. Para ello, debemos seleccionar la propiedad Tipo de gráfico .
Código:
Sub Charts_Example1 () Dim MyChart As Chart Set MyChart = Charts.Add With MyChart .SetSourceData Sheets ("Sheet1"). Range ("A1: B7") .ChartType = End With End Sub
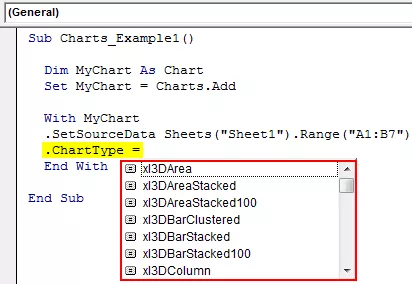
Paso 8: Aquí tenemos una variedad de gráficos. Voy a seleccionar el gráfico " xlColumnClustered ".
Código:
Sub Charts_Example1 () Dim MyChart As Chart Set MyChart = Charts.Add With MyChart .SetSourceData Sheets ("Sheet1"). Range ("A1: B7") .ChartType = xlColumnClustered End With End Sub

Ok, en este momento, ejecutemos el código usando la tecla F5 o manualmente y veamos cómo se ve el gráfico.

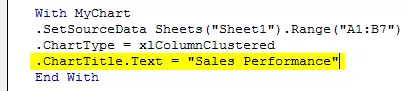
Paso 9: Ahora, cambie otras propiedades del gráfico. Para cambiar el título del gráfico, a continuación se muestra el código.
Así, tenemos muchas propiedades y métodos con gráficos. Utilice cada uno de ellos para ver el impacto y aprender.
Sub Charts_Example1 () Dim MyChart As Chart Set MyChart = Charts.Add With MyChart .SetSourceData Sheets ("Sheet1"). Range ("A1: B7") .ChartType = xlColumnClustered .ChartTitle.Text = "Sales Performance" End With End Sub
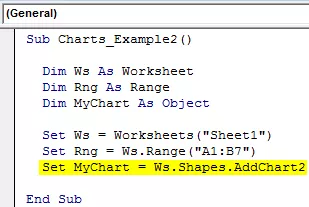
# 2 - Cree un gráfico con la misma hoja de Excel que Shape
To create the chart with the same worksheet (datasheet) as shape, we need to use a different technique.
Step 1: First Declare threes Object Variables.
Code:
Sub Charts_Example2() Dim Ws As Worksheet Dim Rng As Range Dim MyChart As Object End Sub

Step 2: Then Set the Worksheet reference.
Code:
Sub Charts_Example2() Dim Ws As Worksheet Dim Rng As Range Dim MyChart As Object Set Ws = Worksheets("Sheet1") End Sub

Step 3: Now set the range object in VBA
Code:
Sub Charts_Example2() Dim Ws As Worksheet Dim Rng As Range Dim MyChart As Object Set Ws = Worksheets("Sheet1") Set Rng = Ws.Range("A1:B7") End Sub

Step 4: Now, set the chart object.
Code:
Sub Charts_Example2() Dim Ws As Worksheet Dim Rng As Range Dim MyChart As Object Set Ws = Worksheets("Sheet1") Set Rng = Ws.Range("A1:B7") Set MyChart = Ws.Shapes.AddChart2 End Sub
Step 5: Now, as usual, we can design the chart by using the “With” statement.

Code:
Sub Charts_Example2() Dim Ws As Worksheet 'To Hold Worksheet Reference Dim Rng As Range 'To Hold Range Reference in the Worksheet Dim MyChart As Object Set Ws = Worksheets("Sheet1") 'Now variable "Ws" is equal to the sheet "Sheet1" Set Rng = Ws.Range("A1:B7") 'Now variable "Rng" holds the range A1 to B7 in the sheet "Sheet1" Set MyChart = Ws.Shapes.AddChart2 'Chart will be added as Shape in the same worksheet With MyChart.Chart .SetSourceData Rng 'Since we already set the range of cells to be used for chart we have use RNG object here .ChartType = xlColumnClustered .ChartTitle.Text = "Sales Performance" End With End Sub
This will add the chart below.

#3 - Code to Loop through the Charts
Like how we look through sheets to change the name or insert values, hide & unhide them. Similarly, to loop through the charts, we need to use chart object property.
The below code will loop through all the charts in the worksheet.
Code:
Sub Chart_Loop() Dim MyChart As ChartObject For Each MyChart In ActiveSheet.ChartObjects 'Enter the code here Next MyChart End Sub
#4 - Alternative Method to Create Chart
We can use the below alternative method to create charts. We can use the Chart Object. Add method to create the chart below is the example code.
This will also create a chart like the previous method.
Code:
Sub Charts_Example3 () Dim Ws como hoja de trabajo Dim Rng como rango Dim MyChart como ChartObject Set Ws = Worksheets ("Sheet1") Set Rng = Ws.Range ("A1: B7") Set MyChart = Ws.ChartObjects.Add (Izquierda: = ActiveCell.Left, Width: = 400, Top: = ActiveCell.Top, Alto: = 200) MyChart.Chart.SetSourceData Fuente: = Rng MyChart.Chart.ChartType = xlColumnStacked MyChart.Chart.ChartTitle.Text = "Rendimiento de ventas" Fin Sub